Guide
How to measure a PDF plan
You can measure a PDF drawing in about a minute: open it, tell the tool what scale the sheet was drawn at, then click. This guide walks through distances, square footage and angles on a floor plan, with the free browser tool at pdfmeasure.com. Nothing to install, and the file never leaves your computer.
What you need
- The PDF. A floor plan, site plan, elevation, section or shop drawing. Vector PDFs exported from CAD and scanned paper plans both work.
- Its scale. Usually printed in the title block, such as 1/4″ = 1′-0″ or 1:50. If you can't find it, one dimension you can read on the sheet is enough: see step 2.
- A browser. Chrome, Safari, Firefox or Edge, on a computer, an iPad or a phone.
Step 1: Open the PDF
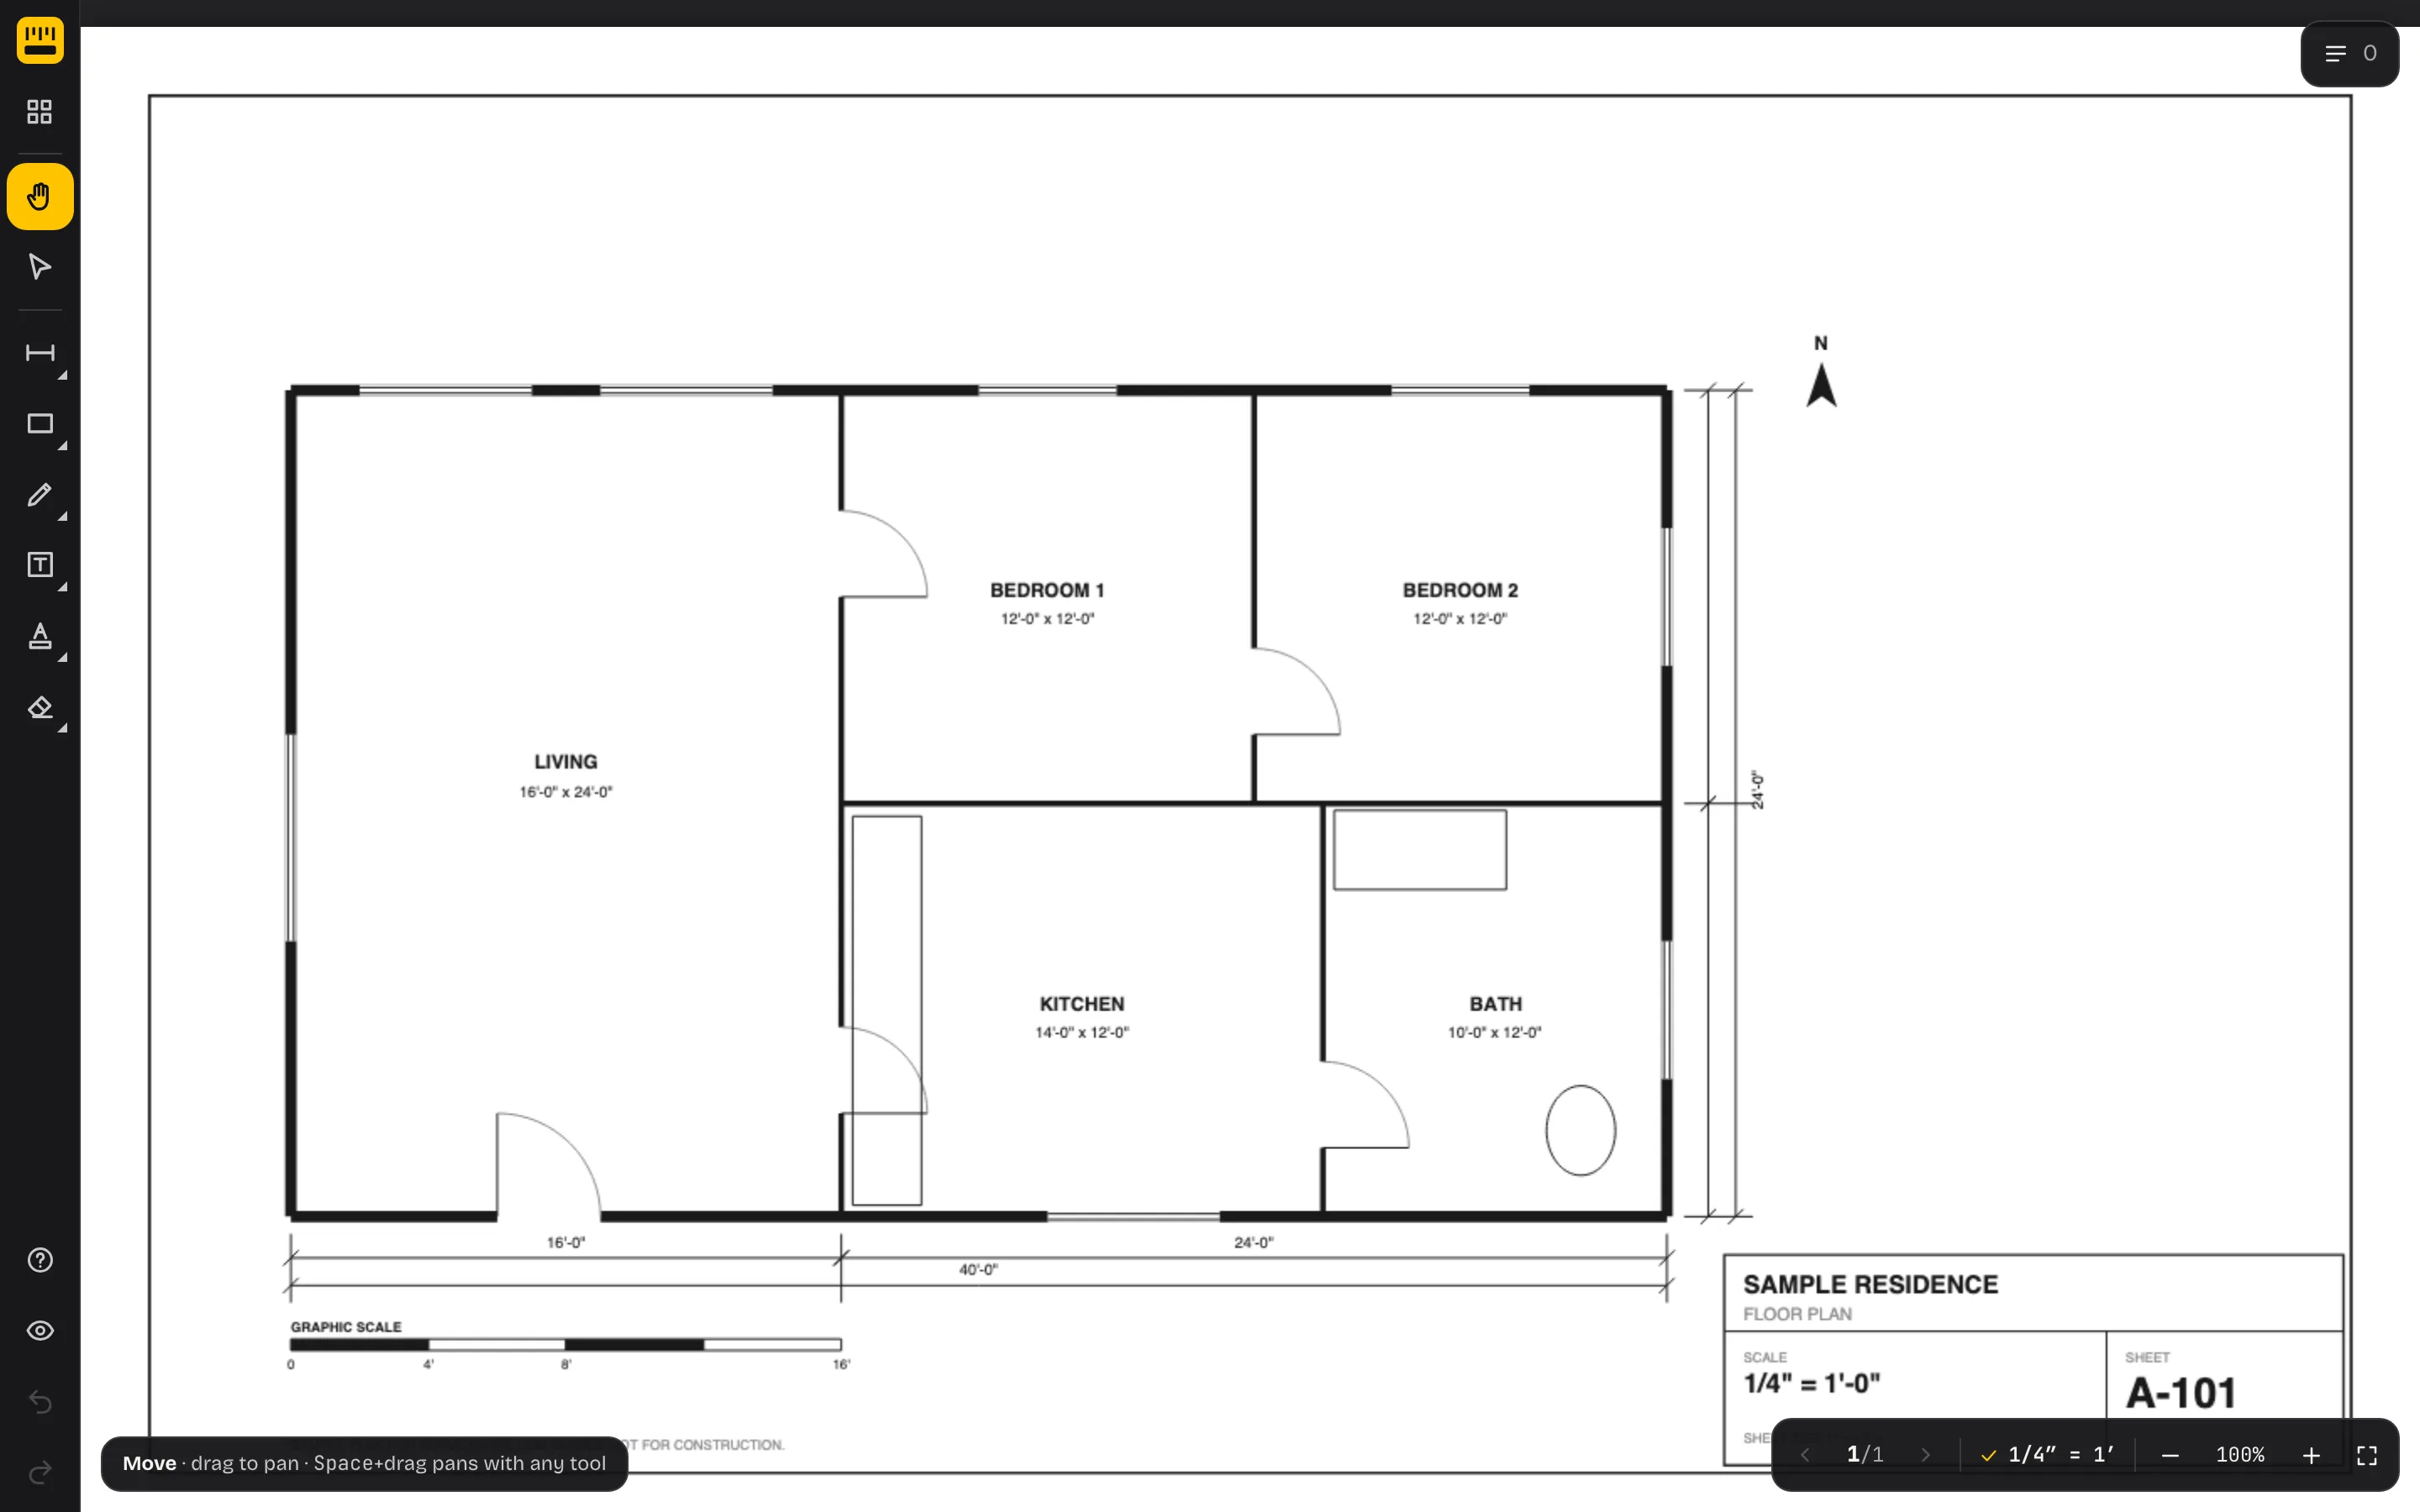
Go to pdfmeasure.com and drop the PDF anywhere on the page, or click Choose a PDF. The drawing opens in the viewer with the tool rail on the left and the page, scale and zoom controls at the bottom right. Multi-page sets open as one document; the thumbnails button on the rail switches pages.
Step 2: Set the scale
Every measurement depends on this, so do it first. Click the scale readout at the bottom right (it starts at 1/4″ = 1′) and pick the scale printed on the sheet. The menu has the architectural scales from 1″ = 1′ down to 1/8″ = 1′, the engineering scales from 1″ = 10′ to 1″ = 100′, and the metric 1:n scales.
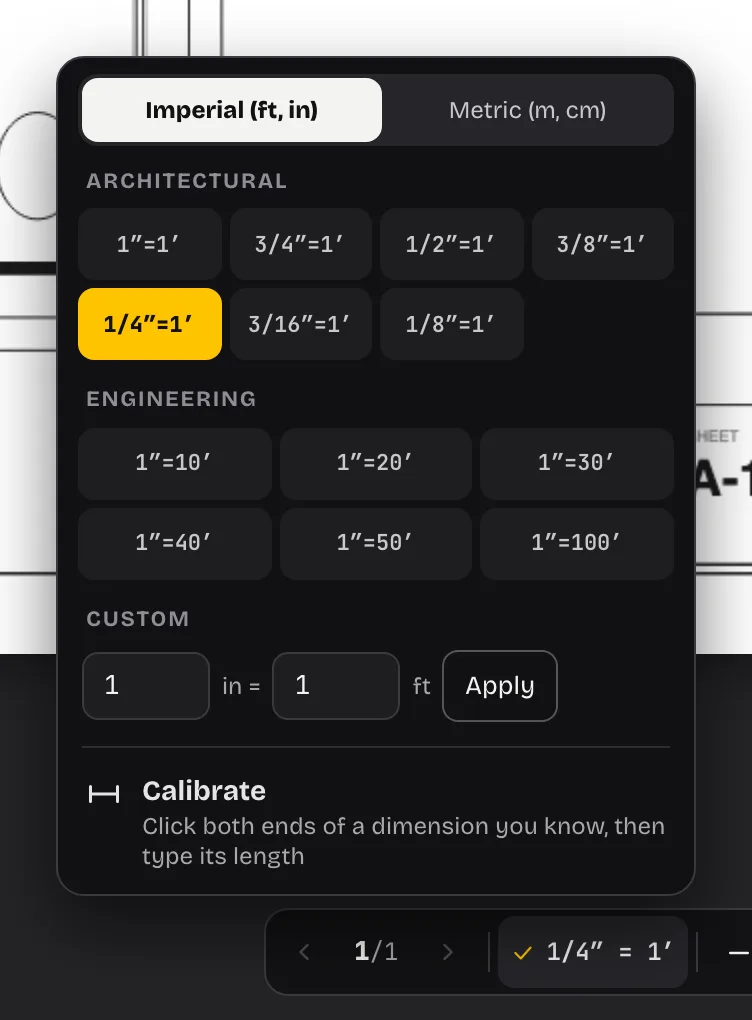
If the scale isn't printed, or you don't trust it, choose Calibrate instead and click both ends of a dimension you can read on the drawing, then type its length. The tool works out the scale from that. Use the longest dimension string you can find: a 40′ overall dimension gives a far better calibration than a 3′ door. Our guide on finding the scale of a PDF plan covers the places the scale hides and why a printed scale is often wrong.
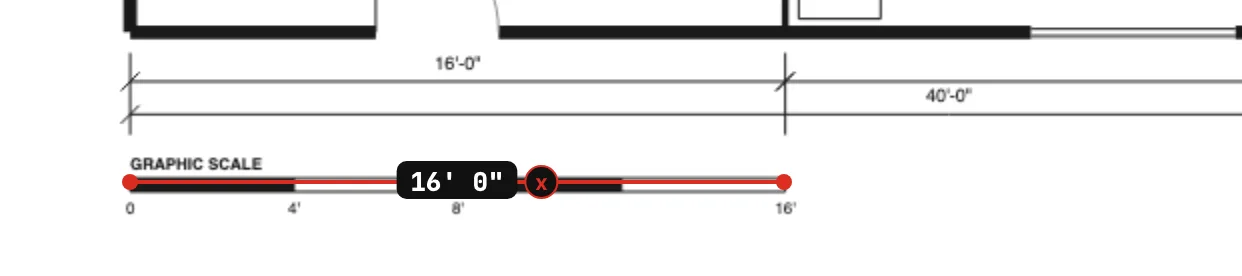
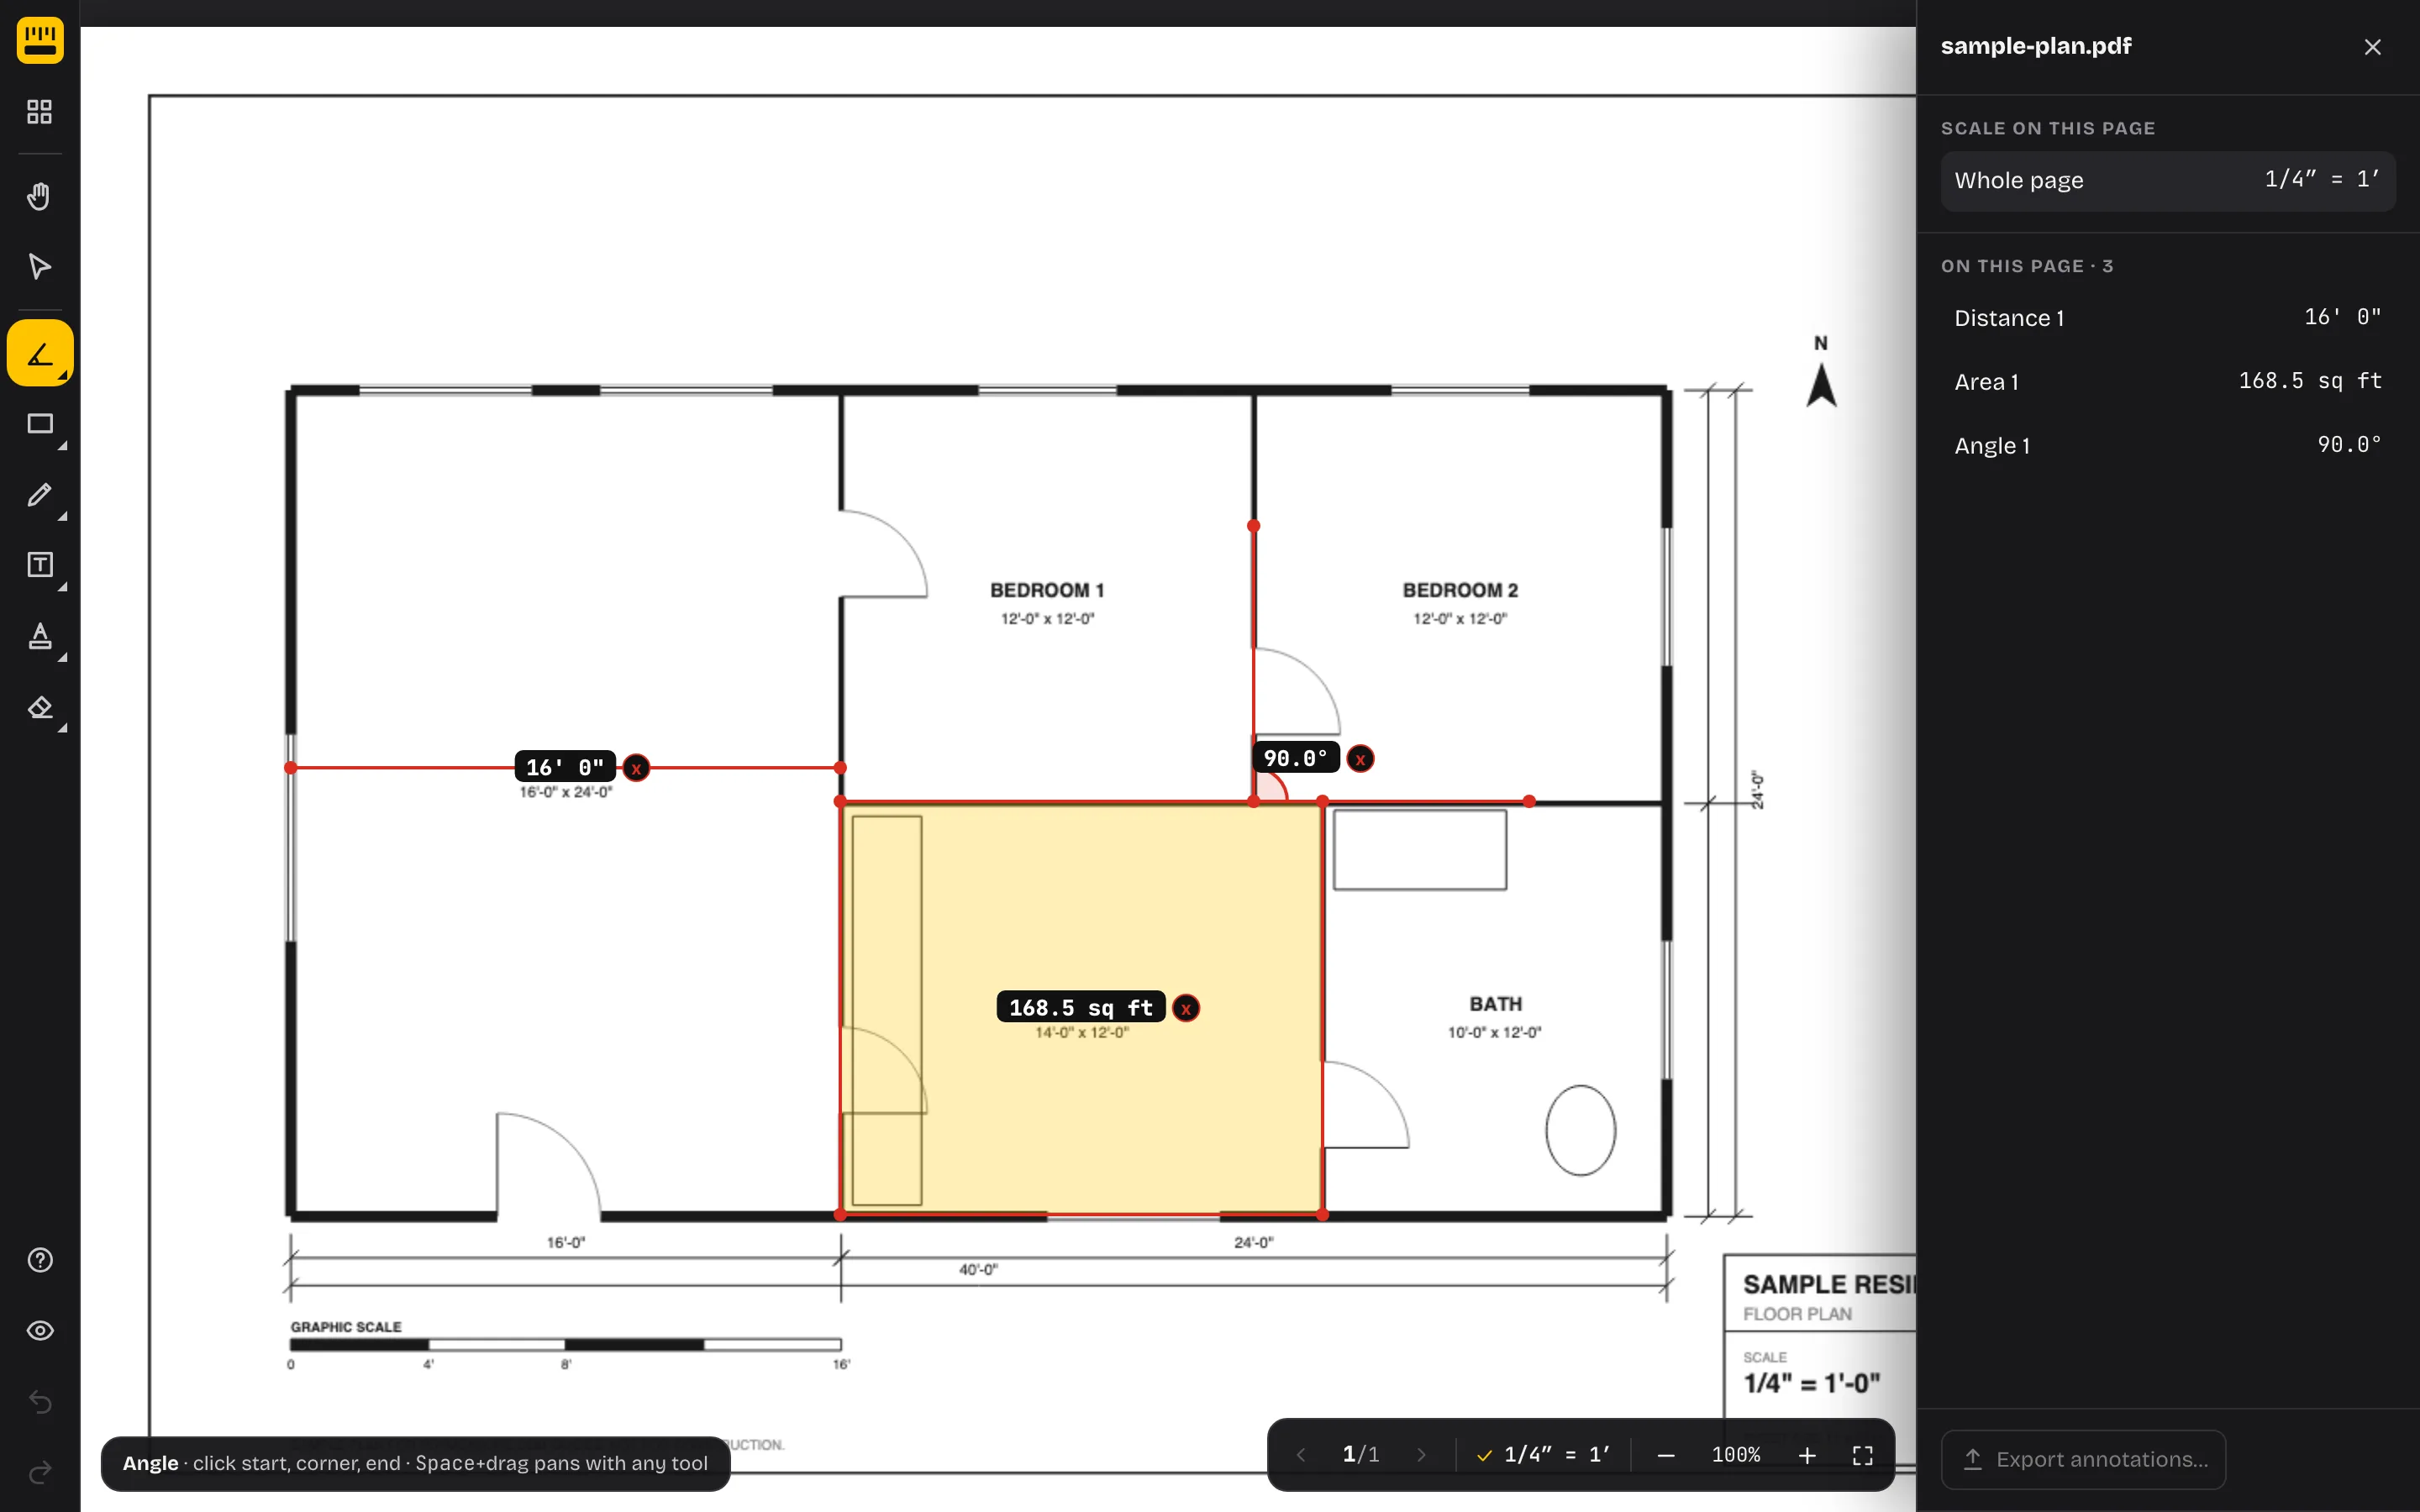
Check it. Before measuring anything that matters, measure a dimension string or the graphic scale bar. Here the bar reads 0 to 16′ and the Distance tool agrees, so the scale is right.
Step 3: Measure a distance
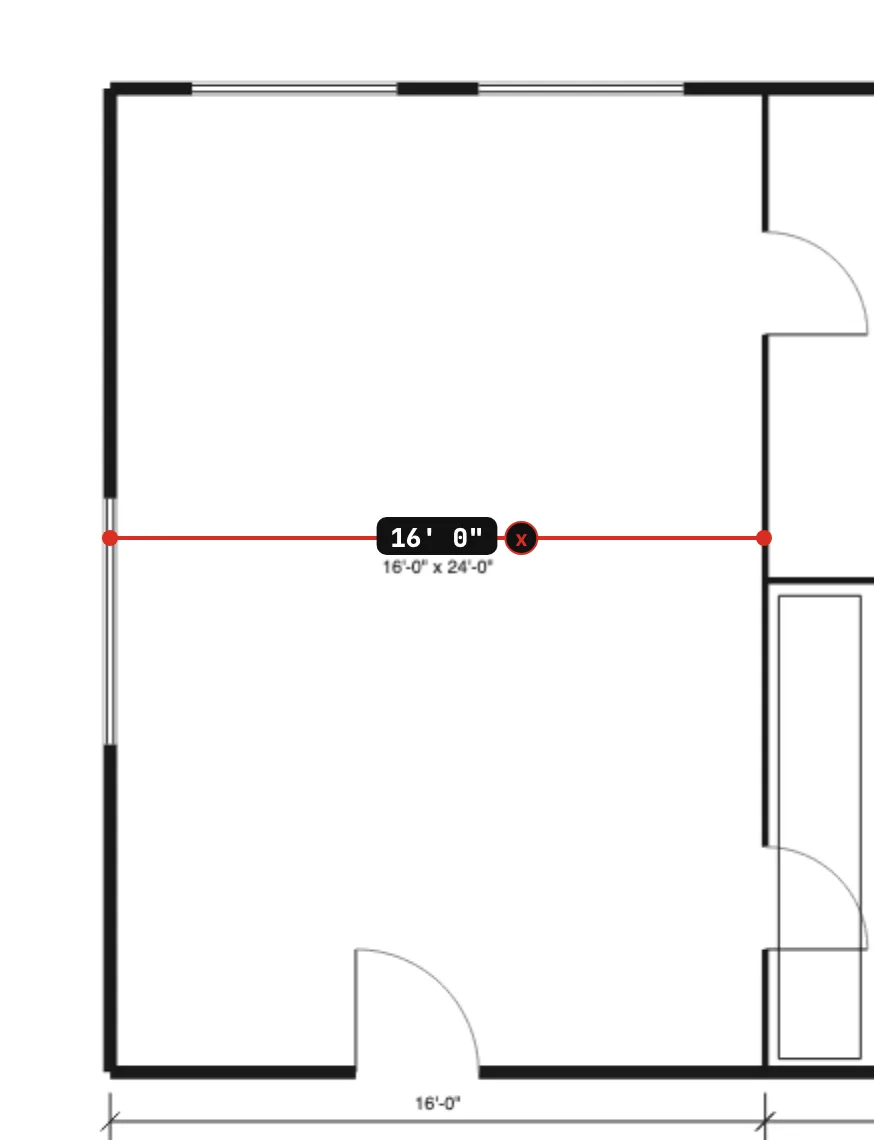
Choose Distance from the Measure group on the rail, or press M. Click the first point, then the second. The length appears on the line, in feet and inches or in metres depending on your unit setting.
- Zoom in before you click. Points are stored in the PDF's own coordinates, not in screen pixels, so the closer you zoom the more precisely you can place them. Pinch, Ctrl + scroll, or use the zoom control at the bottom right. Ctrl+0 fits the page to the window.
- Hold Shift while placing the second point to keep the line perfectly horizontal or vertical.
- Decide what you're measuring. Architects dimension to the face of stud or the centreline of a wall; a flooring order wants the clear distance between finished faces. Click the lines that match what you need.
Step 4: Measure an area (square footage)
Choose Area or press S. Click each corner of the room in order and double-click the last one to close the shape. The readout gives the area; the inspector also lists the perimeter of the same shape, which is the baseboard or crown run.
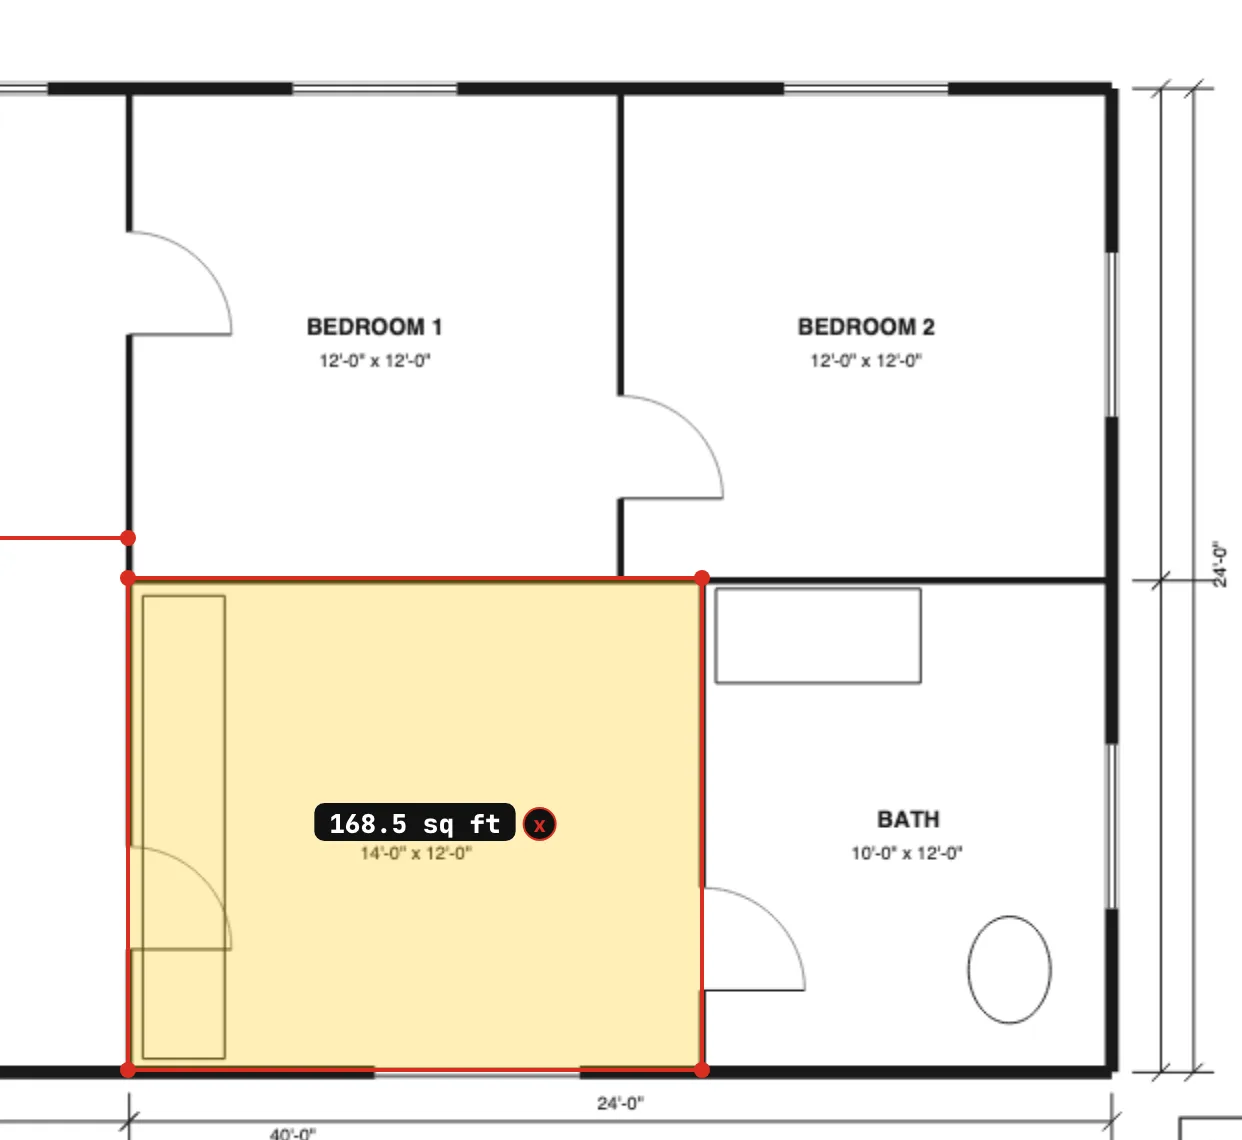
- L-shaped and odd rooms are no harder: keep clicking corners all the way round. There is no limit on the number of points.
- Perimeter only? The Perimeter tool (O) traces an open or closed run and reports only its length, handy for fencing, trim or pipe.
- Several rooms can each get their own area. The inspector adds them up for you.
Step 5: Measure an angle
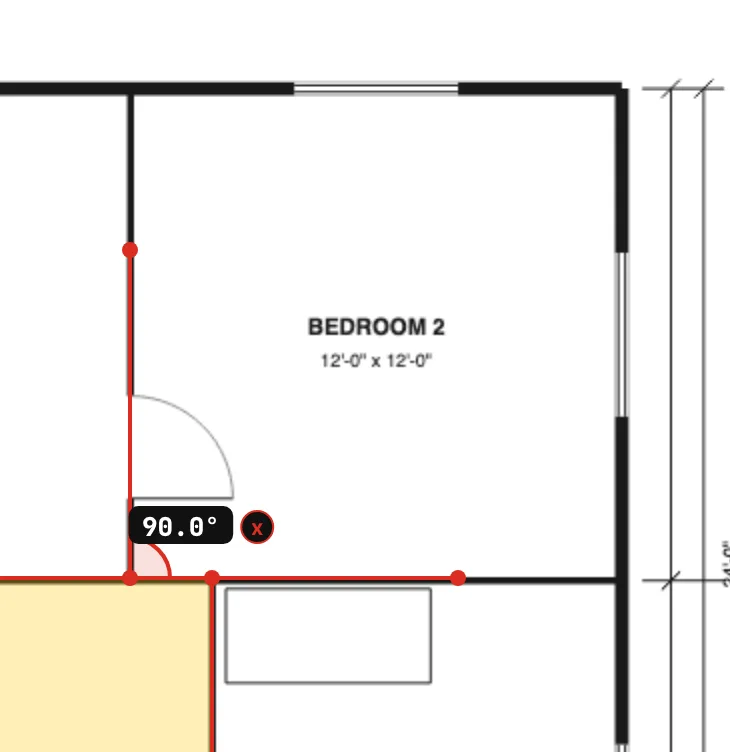
Choose Angle or press N. Click a point on the first line, then the corner, then a point on the second line. The angle in degrees appears at the corner. This covers splayed walls, roof pitches on a section, and stair stringers.
Step 6: Review the totals and export
The chip at the top right counts your measurements. Click it to open the inspector, which lists every distance, area, perimeter and angle on the current page with a running total, and lets you click any of them to find it on the drawing.
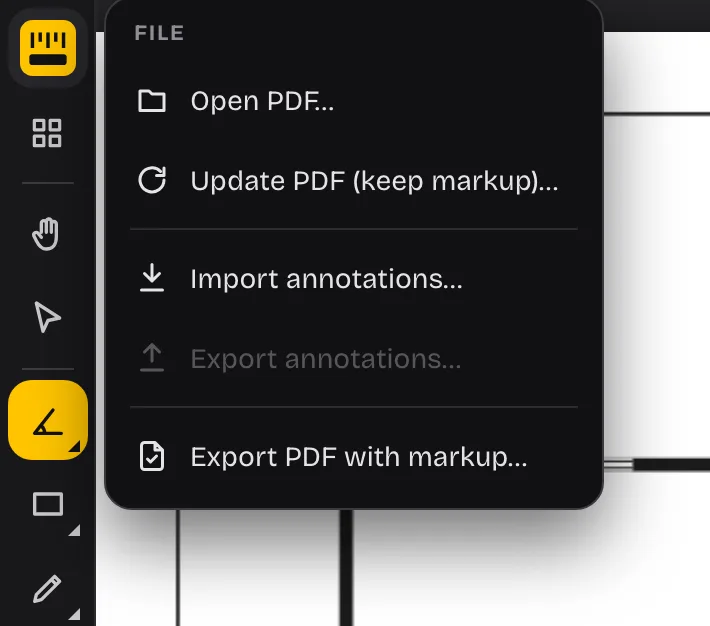
When you're done, open the File menu from the logo at the top of the rail and choose Export PDF with markup. You get a copy of the drawing with every measurement and markup drawn on it, ready to email or print. The same menu exports the markups as a JSON file, which anyone can import onto their own copy of the PDF to pick up where you left off.
Tips for accurate measurements
- Trust the dimension strings over the scale. Drawings are dimensioned by hand; the scale is a convention. If a dimension string says 12′-0″ and your measurement says 11′-10″, the string is right and the scale needs calibrating.
- Scanned plans rarely keep their printed scale, and the two axes can even differ slightly. Always calibrate a scan, and check a dimension in the other direction too.
- One scale per document. If a set mixes scales from sheet to sheet, change the scale when you change page. Measurements already made keep their real-world values.
- Metric drawings work the same way. Switch the units at the top of the scale menu and the presets become 1:20, 1:50, 1:100 and so on, with results in metres.